
Today we will teach you about QuickBooks point-of-sale departments. Using a department is a good way to monitor sales performance. It’s also good to manage inventory and run meaningful reports which will help you make and informed buying decision when you’re going to buy from your vendors. It will also give you a greater flexibility when conducting a physical inventory changing prices and printing price tags.
Let’s begin:
- From your QuickBooks point-of-sale screen click “Department List”.
- Department List screen will appear, click “Add” on the right side of the screen.
- n your Add Department fill in the Department Code, Department, Tax code, Markup. Then click “SAVE”. For example, you set the Dept Code to “BOO”, Department to “BOOTS”, Tax code to “TAX”, and Markup to “30”.
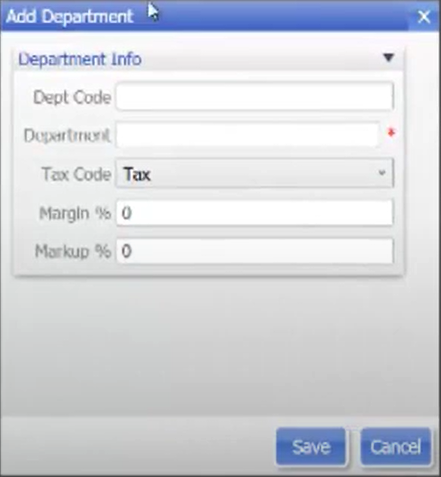
- Dept Code – the code you want to put your department. Three letters code only.
- Department – name you want to give on your department.
- Tax code – you can only choose Tax or Non. Once you set your Tax code and you create an item it will automatically set tax or non-taxable for the item.
- Margin and Markup – these don’t calculate or automatically set up when you create an item it’s more like a guideline. If you figure out the margin or markup for your item you go back again here and set it up again manually.
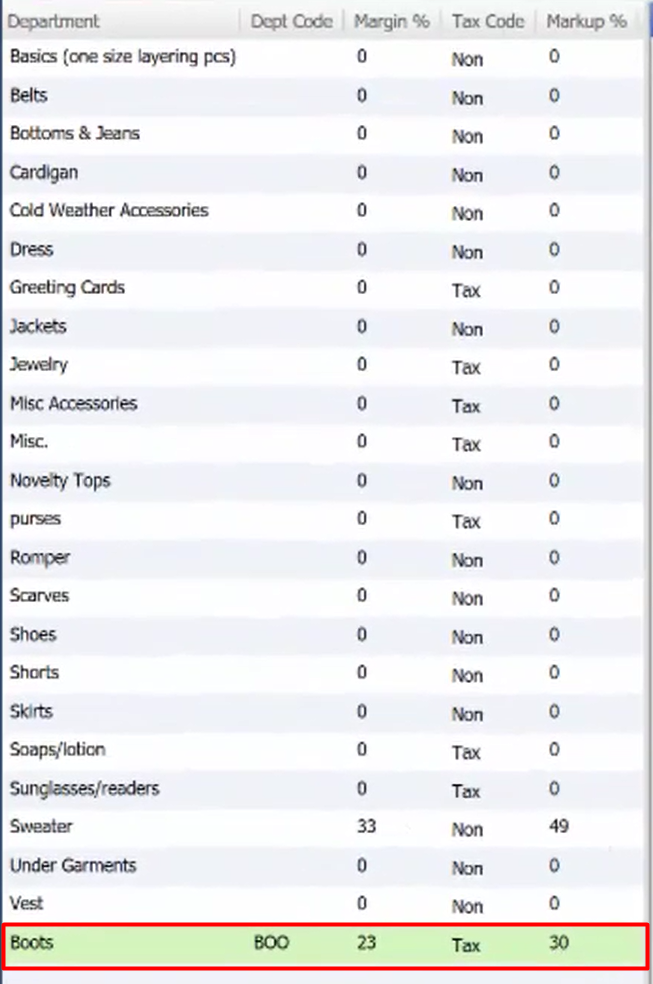
- This will appear on your Department List.
For the item Department reports
- On the Menu bar go to “Report” and “Sales then click “Item Summary”
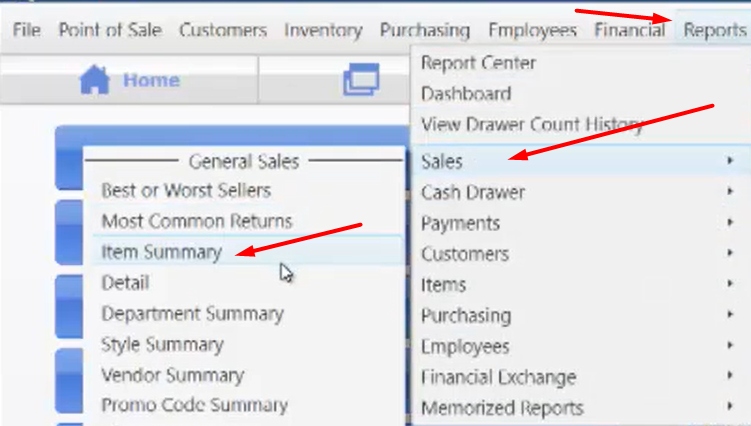
- If you want to make a report sales items to see how much you’ve been selling you can easily filter or add a column on your field by:
- In adding a column
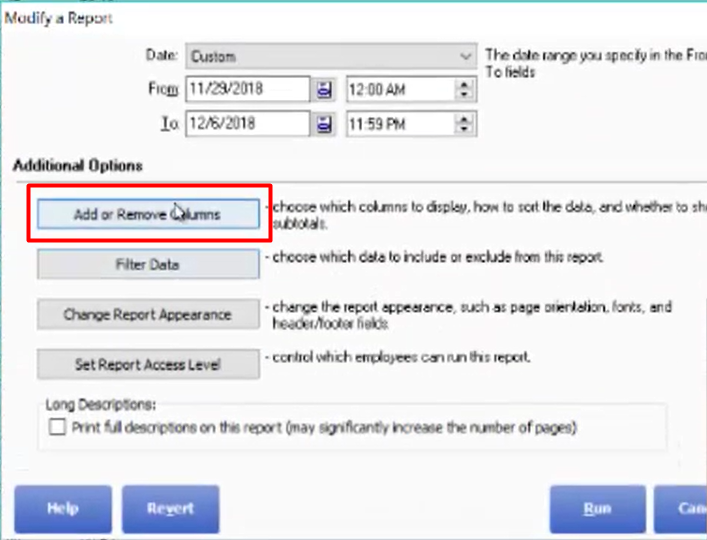
- go to “Modify”.

- Click “Add or Remove Columns”.
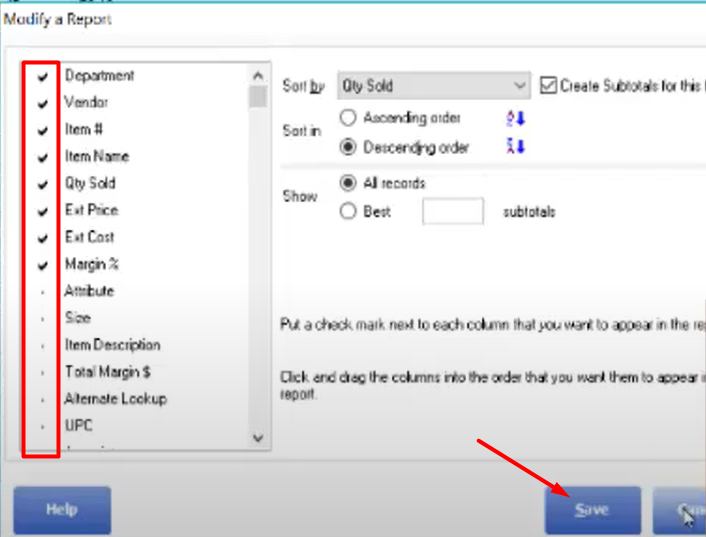
- then Check on the columns you want to add on your field, then click “SAVE”.
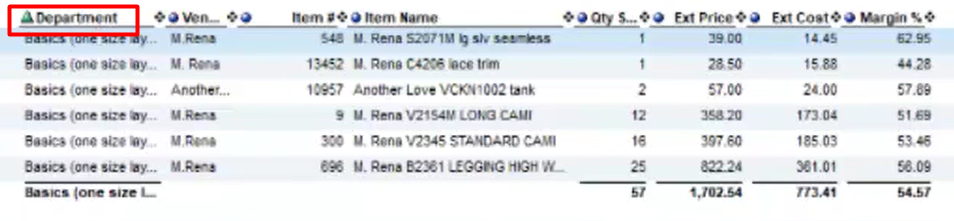
- “Department” will add up to your column in your field. This will categorize all the items by department, and you can now order all things by department in reports.
- go to “Modify”.
- In filtering your data.
- go to “Modify”.

- Click “Filter Data”.
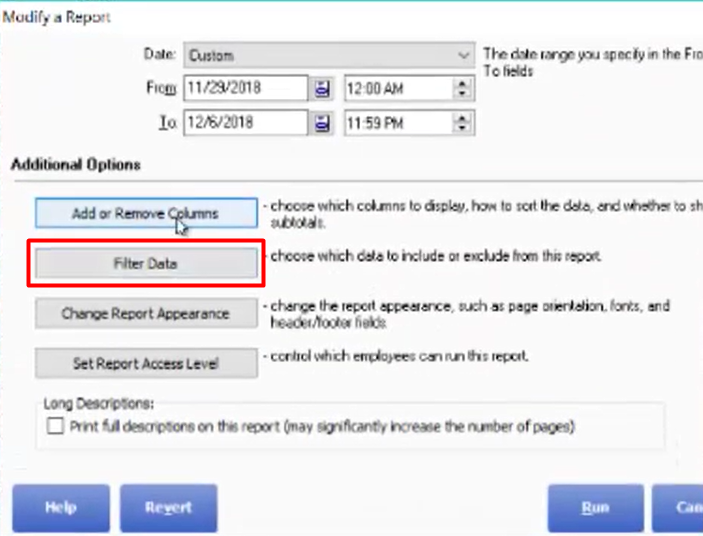
- Go to “Department”
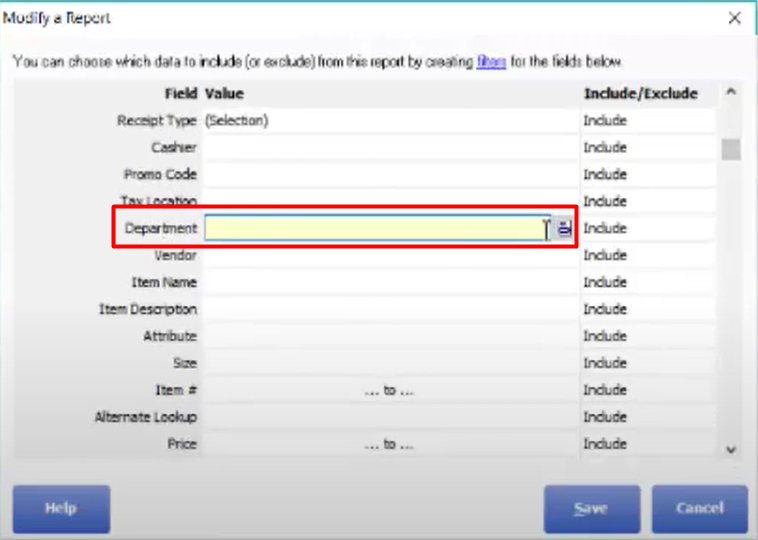
- Choose the items you want to filter. Then click “Save” and click “Run”.
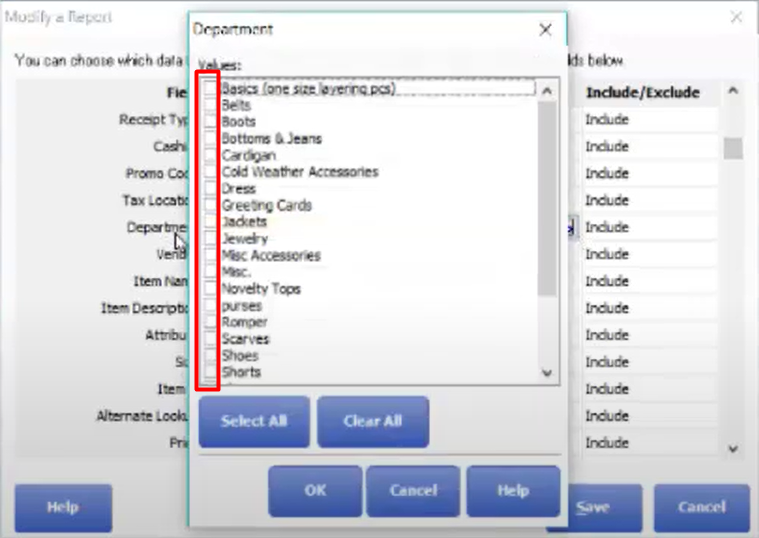
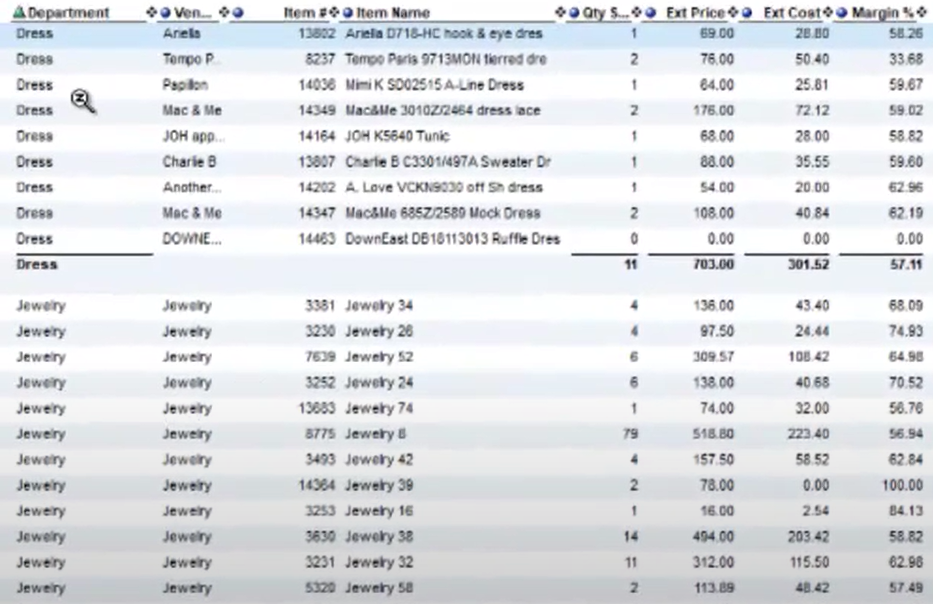
- For example, you only choose “Dress” and “Jewelry” to filter. These two items will show all on your field by department.
- go to “Modify”.
- In adding a column