
This topic will cover on how to modify QuickBooks Point of Sale Price Tags.
So let’s get started:
- Go to “File” menu → then “Tools” → then click “Print Designer”

- In the Print Designer window, choose “Inventory Tags” for the drop down box. Under the “Inventory Tags” document type, select the “Intuit Label (small)” template.
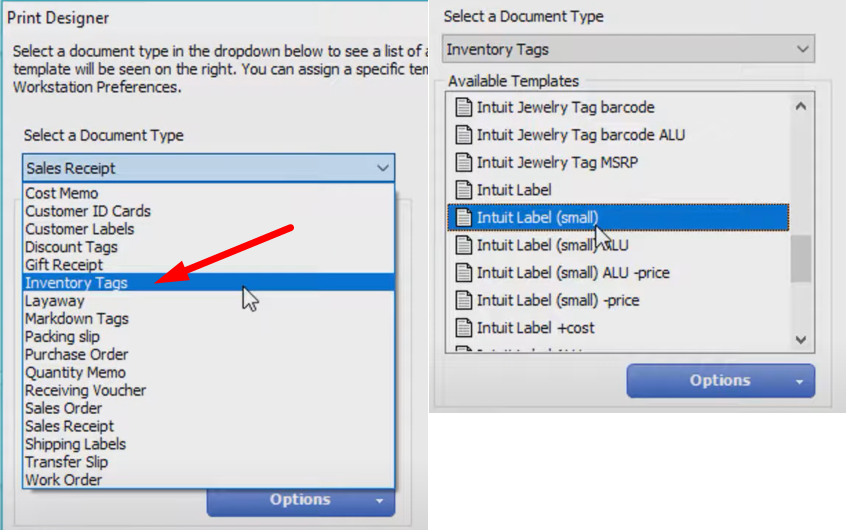
- Click on “Modify”.
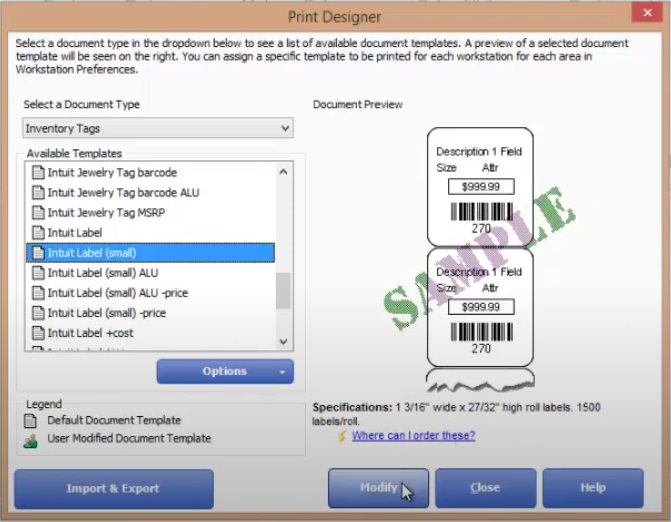
- From there, we can now start customizing our own small price tag. We can resize, arrange, remove or add fields on the price tag. Sample Images below
- Resize:

- Move/ Arrange:

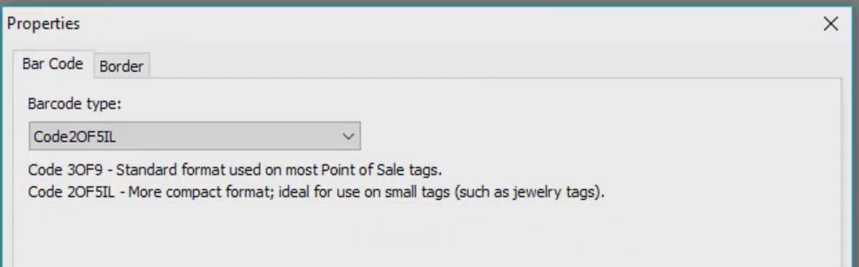
- For Barcode Properties double click on the barcode to open the Properties window. It is suggested for small price tags to set the type to : “Code2OF5IL”
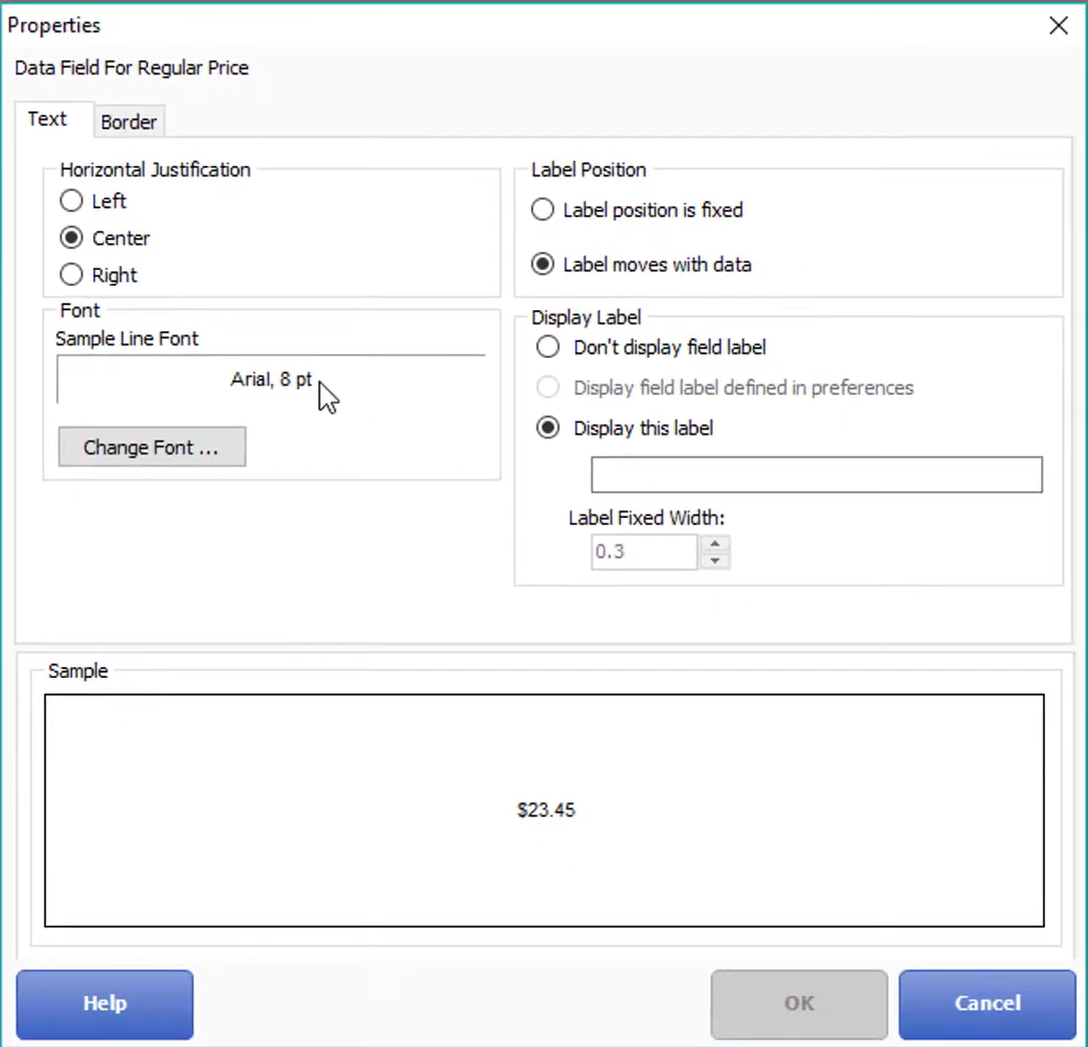
- For editing the price, double click on the price textbox.
- For Adding a new text label, click on “Add” and fill the necessary information and format.


- Under the “Preferences” button, there is a setting that snaps overlapping objects to their edges. We can untick or turn off the option to move or change the positions of the prices, barcodes and others freely.


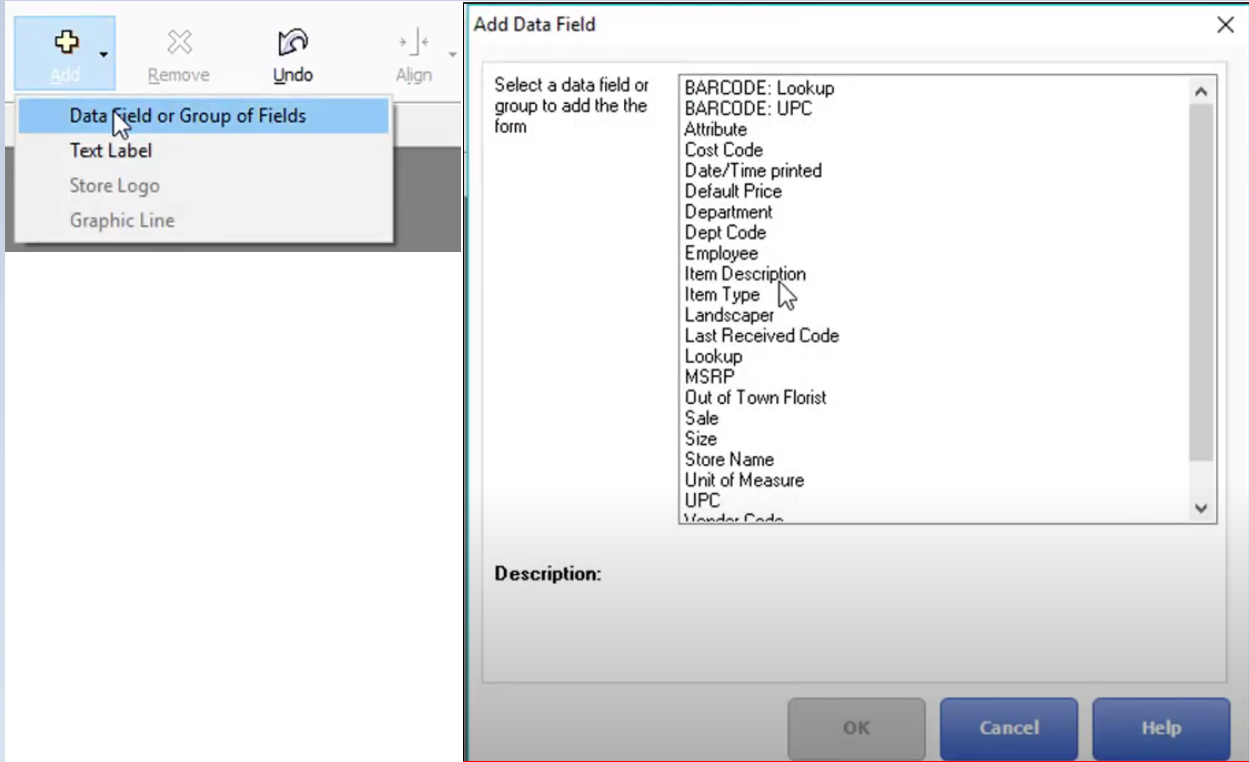
- Lastly, just a quick tip about adding another data field to the price tag. Click “Add” → then click on “Data Field or Group of Fields”. Select what field do you want to include in the price tag.
- Resize: