
Today we will be going to talk about Physical Inventory Overview.
Let’s begin:
- First, lets go to Physical Inventory screen.
- Go to “File” menu then select “Start Physical Inventory”.
- Physical Inventory screen will appear.
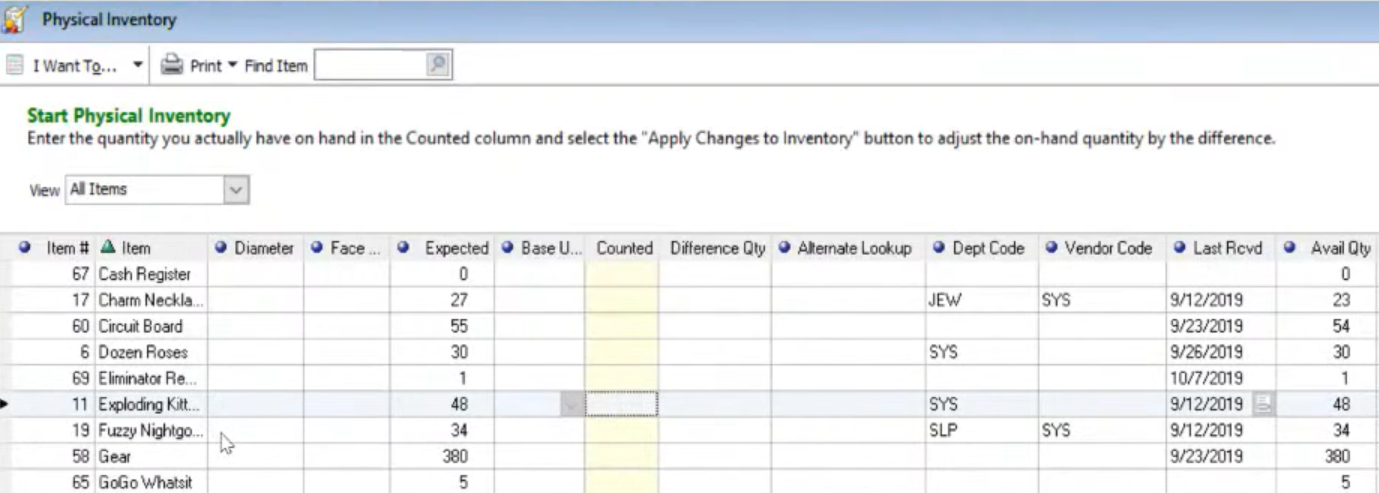
- Now, lets talk about the important features of this Physical Inventory.
- “Counted” column is the most important column in your Physical Inventory field.

- Counted column – you enter here the quantity of the item when you manually count it.
- “Expected” column is the expected number of quantities of your item base on your point of sale.
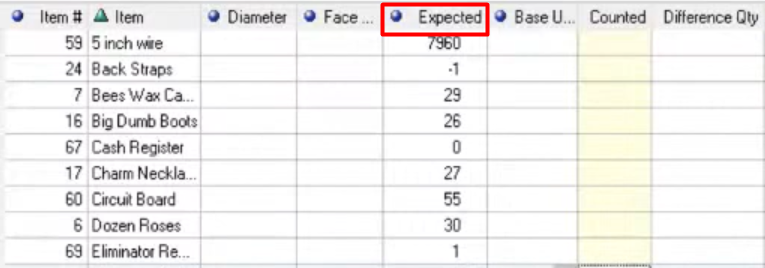
- “Difference Qty” column is the difference of Expected and Counted column.

- For example, your Counted quantity of 5-inch wire is 7020 and your Expected is 7960 when you calculate their difference its -940.
- “View drop-down” menu.
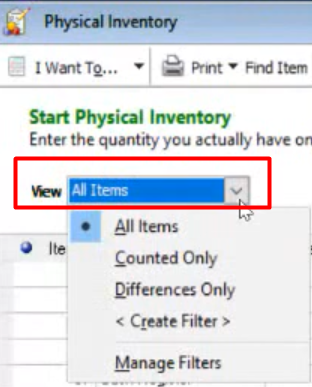
- All Items – it will show you all the items in your point of sale.
- Counted Only – it will show you all the items you have counted and enter their quantity.
- Difference Only – it will show you all the items that has a difference quantity.
- Create Filter – you can custom filter each and every item, vendor, or department in your field. This will enable you to look at the inventory counts just by items, vendors, or departments.
- Note: changing the view does not change the actual inventory count.
- “Print“ menu.
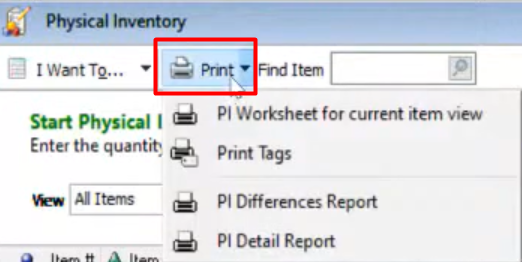
- PI Worksheet for current item view – if you want to do your inventory alpha worksheet.
- Print tags – if you want to print your tags on your items.
- PI Difference Report – it will print all the inventory with Difference quantity on your field.
- PI Detail Report – it will print out all your inventory on your physical inventory screen.
- “Find Item drop-down” menu.
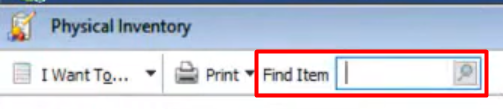
- Its where you search an item on your physical inventory screen.
- For example, you search for “Shirt”. It will show you all the Shirt items on your inventory.
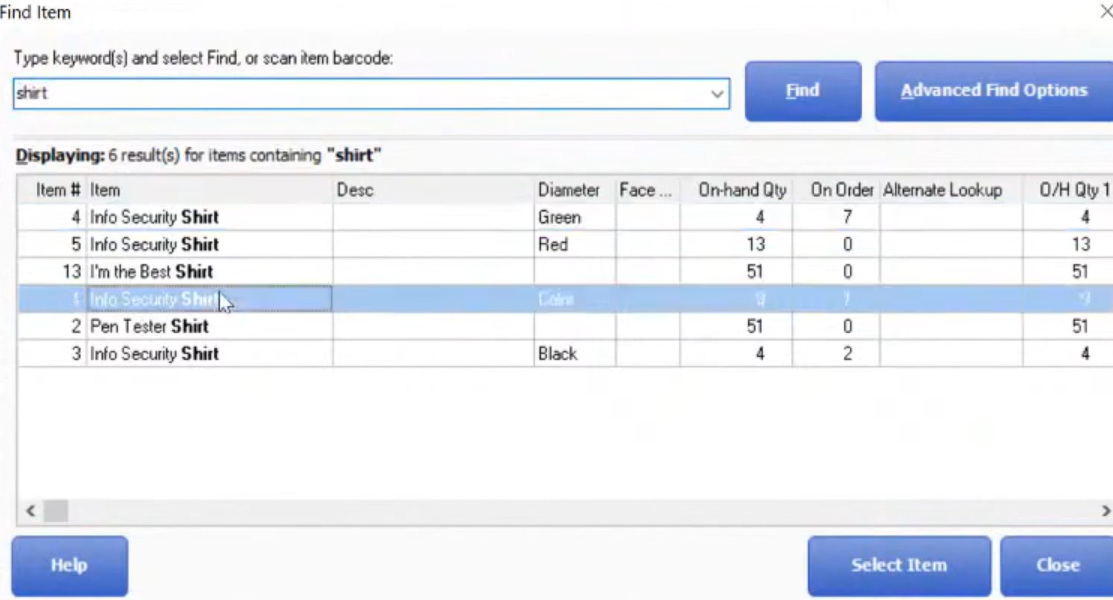
- Now, if you choose a certain Shirt (for example, Info Security Shirt) then you select “Select Item” it will go directly on the item on the field.
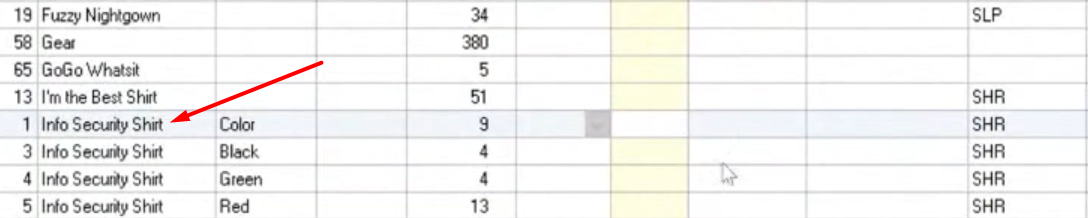
- This is very helpful you don’t have to manually look at your physical inventory field.
- “I want to” menu.
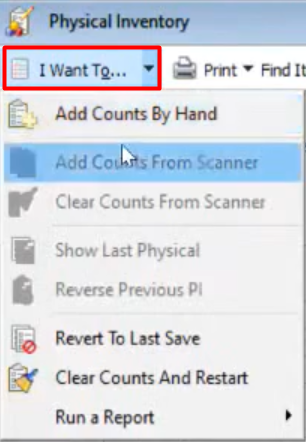
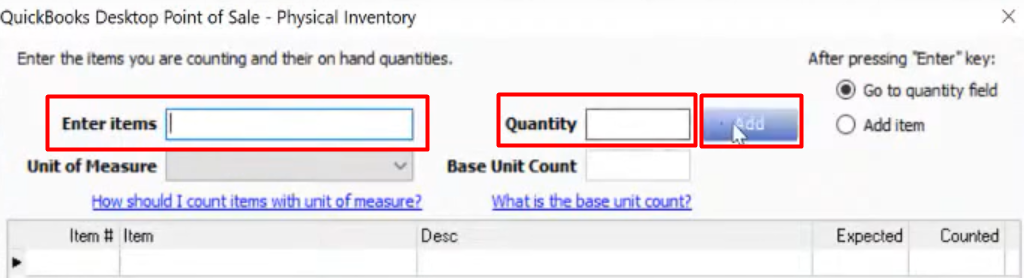
- Add Counts by Hand – you can add here an item by scanning the barcode of the item in “Enter Items” enter the number of quantities in “Quantity” then select “Add”. Select “Save” when you’re done.
- Revert to Last Save – you can go back to the last time you select save on your physical inventory field.
- Clear Counts and Restart – it will clear and restart your whole inventory count on your physical inventory field.
- Add Counts by Hand – you can add here an item by scanning the barcode of the item in “Enter Items” enter the number of quantities in “Quantity” then select “Add”. Select “Save” when you’re done.
- “Apply Changes to Inventory” button, this will actually change all the numbers in your inventory the moment that you change, add, or edit a number on your inventory list.

- “Save and Continue” button, this will save your work then you can now go back to your home screen.
- “Counted” column is the most important column in your Physical Inventory field.