
Today we are going to talk about editing departments in QuickBooks point of sale.
Let’s begin:
- On your Home screen, go to “Department List”.
- On your Department List screen, choose a department you want to edit. Then select “Edit” on the upper right corner of the screen.
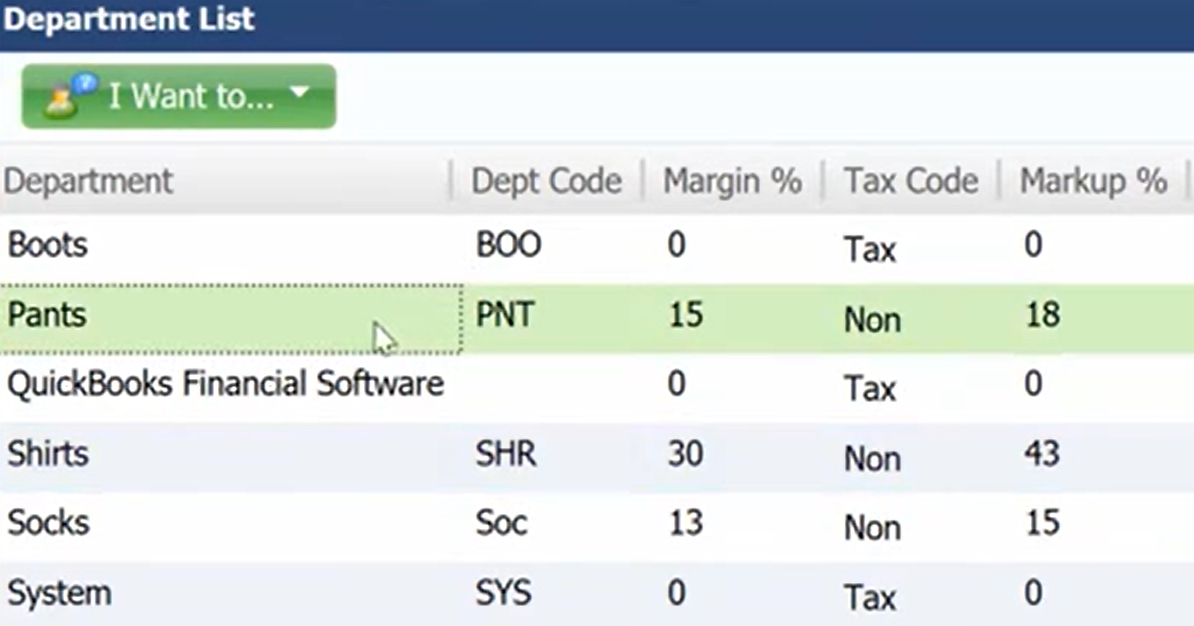
- Edit Department screen will appear. You can now edit your department information. After you edit select “Save”.

- This is now our new settings for Pants Department.
- Note: Changing the Tax Code and the Margin and Markup will not change the previously made Pants Department. The new settings will take effect on creating a new item on your Pants Department.
- Now, let’s create a new item to use the new settings in Pants Department.
- Go to “Item List”, select “Add” to add inventory item.
- Add Inventory Item screen will appear.
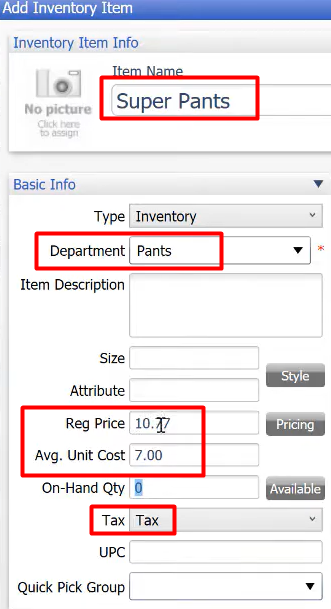
- Enter a name for your item (For example, Super Pants).
- Choose the Pants Department that we just created.
- Automatically under your Tax field it will select “Tax” because of the new settings that we created.
- Average Unit Cost is our Margin and Regular Price is our Markup, so for example we put 7 on our Average Unit Cost it will automatically compute for the Markup or the Regular Price.