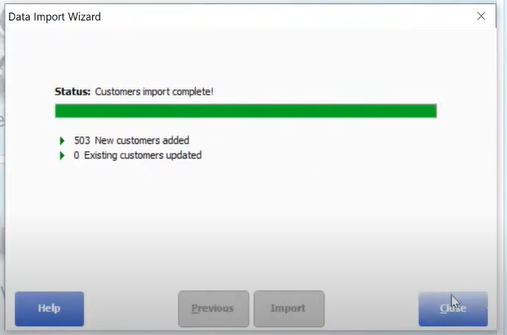
Today we’re going to learn how to import customers, we’ll be using an excel file since most list coming from your previous system can be exported as an excel file spreadsheet. QuickBooks Point of Sale has a feature that lets you import your customers right away to your store in QuickBooks Point of Sale.
So let’s start:
- First, go to “File” menu → then “Utilities” → click on “Import”. Note that this has to be done in your QuickBooks Point of Sale server. Since you won’t find this on any of the clients.

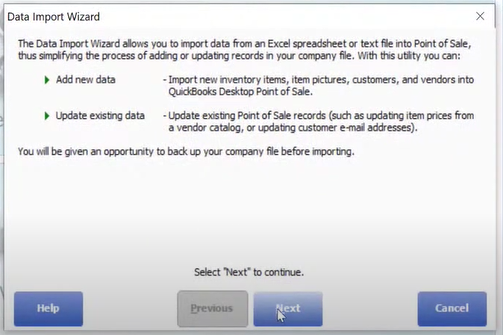
- Click on “Next” when the dialogue box pops up. This dialogue box only explains the function of Data Import Wizard.
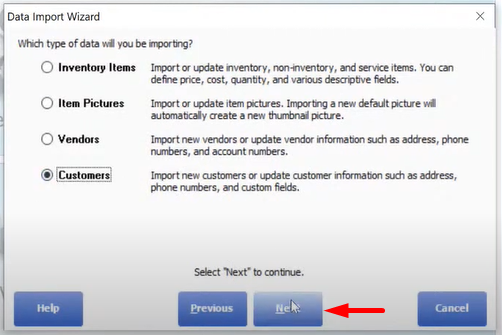
- Now select “Customers” as the type of data that QuickBooks Point of Sale is going to import. Then click “Next”.
- Data Import Wizard will now ask how you would like to import the data. Select “Custom File” since this option will allow you to customize the fields that QuickBooks Point of Sale will look for in the spreadsheet. You can also choose “Default Template” in this option, QuickBooks Point of Sale will provide a template where you can fill in the data needed for that field.

- On this window, choose the file that you want to import by mapping where the spreadsheet is located. Then indicate what sheet is the data located in the spreadsheet and what row to start on. For the Mapping feature, select “<Add new>” this will map the fields in the spreadsheet to the fields equal to QuickBooks Point of Sale.

- Name the File Mapping that we’re going to customize. Then click on “Show all available fields”, as you click the button, QuickBooks Point of Sale will ask you to save the current mapping. Click on “Yes”.

- You can now start mapping the fields from your spread sheet (Table on right side) with the fields of QuickBooks Point of Sale (Table on the left side). After mapping all the fields needed from your spreadsheet, click on “Save”. Then click “Next”.

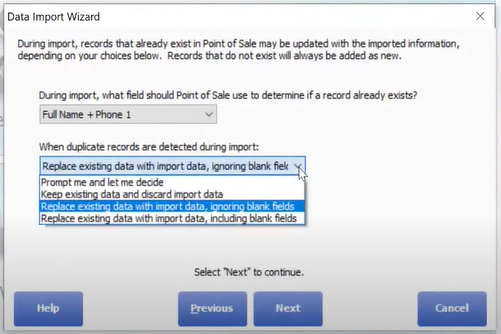
- Select the options that you would prefer when QuickBooks Point of Sale detects a record that already exists during import.
- As you click “Next”, QuickBooks Point of Sale will now start checking the data from your spreadsheet.

- QuickBooks Point of Sale will now show the results of checking the spreadsheet. You can click on the “click here” to check the potential problems found. If all has been verified you can now proceed on importing the data. It is best to keep a backup of the company file before importing.

- Now you have successfully imported your customers to QuickBooks Point of Sale! To verify if it has been imported, quickly click on “Customer List” on the home screen of QuickBooks Point of Sale.