Today we’re going to talk about how you can print jewelry tags out of your point-of-sale.
Let’s begin:
- First you need to setup your price tag roll to the printer. The printer that we use for jewelry price tag in QuickBooks point-of-sale is Zebra Zeebee 410.
- When you already set up the price tag roll to the printer, click on the “Pause button” on the printer to the advance a few price tags and be ready for printing.
- On your QuickBooks point-of-sale screen click on “Item List”.

- Your Item List screen will appear, click on any of the jewelry items or any small items.
- Jewelry price tags are use in jewelry items and on small items only.
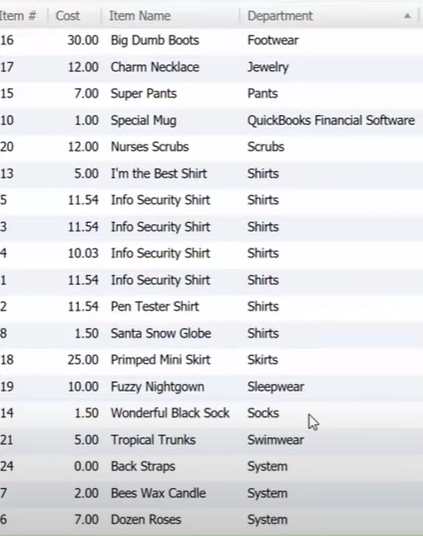
- Jewelry price tags are use in jewelry items and on small items only.
- After you choose the items you want to print, on the left side of the screen click “Price Tags”.

- Print screen will appear.
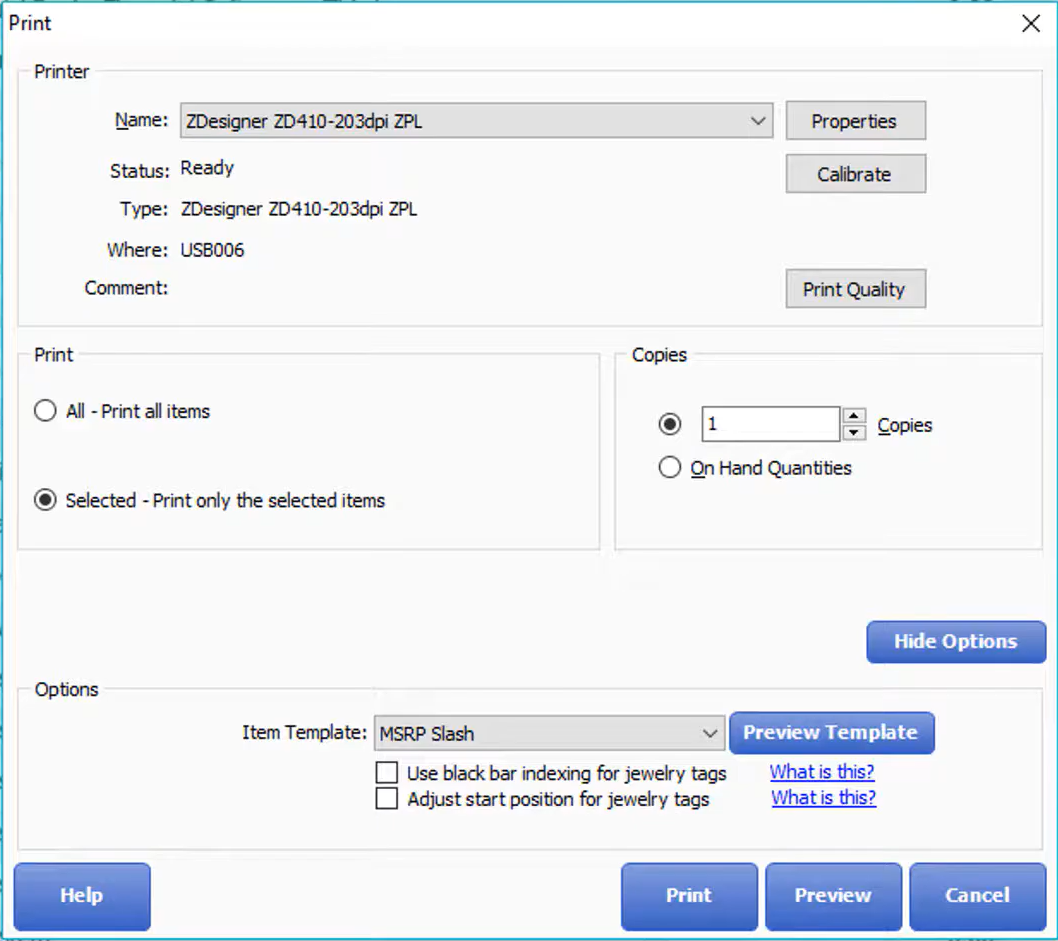
- Make sure you choose ZD410 in your printer name.
- Copies – you put the number of copies you want to print.
- Item template – choose “Intuit Jewelry Tag Barcode” because this is the very useful template for your price tag. Besides the price you also have a barcode to quickly scan your item.
- Check “Use black bar indexing for jewelry tags”. On your price tag roll there’s these black bars in between each and every price tag and that actually tells the printer how to advance
- Check “Adjust start position for every jewelry tag”.
- After you set everything up on the Print screen, click on the “Print” button. Then it will already start printing.