
Today we are going to talk about how to set up an automatic discount.
Let’s begin:
- On your Home screen, go to “Inventory” menu then select “Price Manager”.
- On your Price manager, select “Set Up Automatic Discount”.
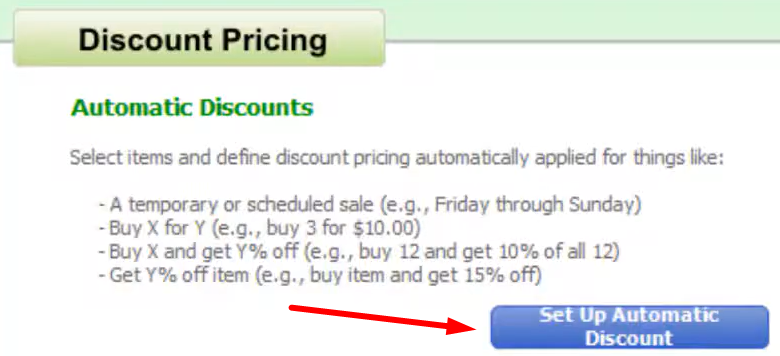
- Choose discount rules will appear.

- On the “Discount drop-down” choose a discount you want to use. (For example, you want to use “Buy X and get Y% off”)

- Below the discount, enter the quantity X and percentage Y.
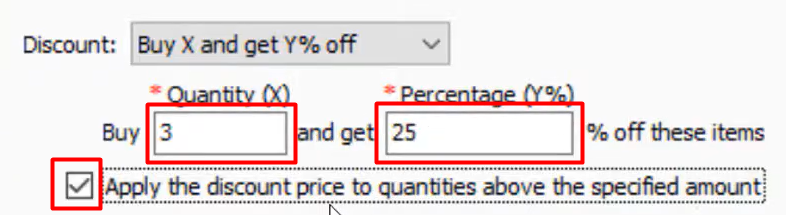
- Make sure to check the box to apply the discount price to quantities above the specified amount.
- You can check the box if you want to put a specified time period of your discount.

- Choose the time and date to when your discount will start and end.
- On the “Discount drop-down” choose a discount you want to use. (For example, you want to use “Buy X and get Y% off”)
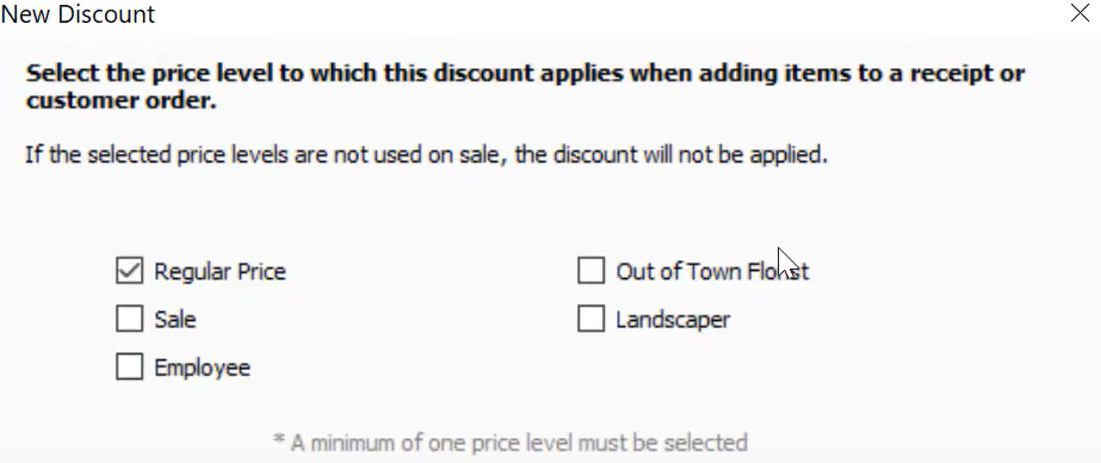
- Select a price level to which the discount will apply (For example, you choose “Regular Price”), then select “Next”.
- Choose which items the discount affects, then select “Next”.

- For example, you choose all items in department of Jewelry.
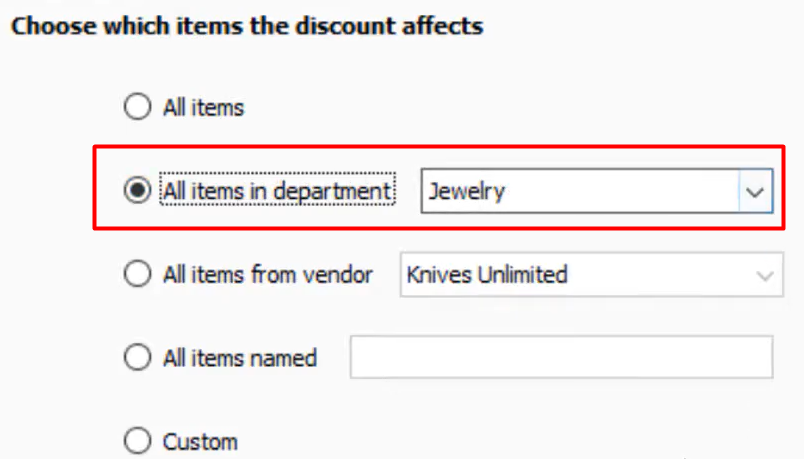
- For example, you choose all items in department of Jewelry.
- Enter your Discount name. You can also put a note on your discount. Select “Finish”.

- Your Automatic Discount is now added to the discount pricing field.

Now, let’s use the Automatic discount that we just created for Jewelry department.
- On your Home screen, go to “Make a Sale”.
- Choose a Jewelry item. (For example, “Charm Necklace”)
- On the sales receipt screen, you will see that charm necklace has an automatic discount of 25% because the item is under Jewelry department.
